Sidebar
Table of Contents
Introduction
This section will go over the installation process for the raspberry pi. The items needed are a Raspberry pi micro-controller, a class 10 SD card, a 5MV power supply, and a computer to install the software. This is the cheapest option to build a piratebox and will cost around $35 - $100. It is allows for the most customization allowing external storage and batteries to be attached. It’s limited by the battery and the wifi adapter attached to it. Once piratebox is installed it will automatically start when the raspberry pi is powered on.
Requirements
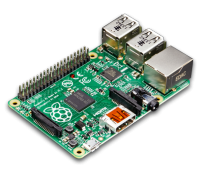
Raspberry Pi (Version A/B/B+/Zero/Zero-W/2/3): Any of the models work but the older A/B models lack the expandability of the later models which limits what you can do. While the A/B models only have two USB ports, the Models B+ and later have 4 which allows for more devices to be attached. The model A/B only have two available USB ports.
SD Card: A class 10 SD card with at least 8GB is recommended.
USB Wifi Adapter: These can be purchased from $10 - $60. The strength of the signal depends on the model. Raspberry pi version 3 and zero-w have a built in adapter which can be used.
5MV USB power supply: A standard micro usb cable attached to a 5mv power supply is all that is needed to power the raspberry pi.
Batterbank (optional): A battery bank allows the piratebox to be portable. It is much easier to conceal the piratebox in a backpack or potentially a pocket instead of relying on a wall socket for power. Expandable USB Storage: An external flash drive or 2.5” drive can be added to increase the storage capacity.
Installing Piratebox on the Raspberry Pi
1. Download the image file from https://piratebox.cc/raspberry_pi:diy
- Bittorrent software is required to download. (qbtorrent, tranmission, µtorrent, ect..)
2. Extract the Zip file using archive software such as winrar or 7zip
3. Insert the SD card and burn the image to it.
- Third party programs are available to do this. The raspberry pi website recommends Win32 Disk Imager: http://www.raspberry-projects.com/pi/pi-operating-systems/win32diskimager
- NOTE: This will delete all of the existing data off of your SD card.
4. Insert the SD card and your wireless adapter into the Raspberry Pi then Connect the 5mv powersource to turn it on.
- Wait around 3 minutes for it to boot
- When it is finished booting then it will start broadcasting a wireless network
5. Connect to the Piratebox access point. SSID: Piratebox - Share Freely
6. SSH into the piratebox at 192.168.77.1 on port 22
- Default Username: alarm
- Default Password: alarm
- For Windows use an ssh client such as putty: http://www.putty.org/
- For Mac / Linux you can use the terminal by typing in the command below
7. Change the default password with this command:
Changing the default password will prevent unauthorized users from gaining access to the piratebox’s SSH interface.
8. Active the imageboard and SD card storage space by typing the commands below
9. Congratulations, your raspberry pi piratebox is set up and ready to use. It will automatically start every time it is powered on.


